As I revisit my early designs for Connors and compare them against photographic evidences, I'm starting to find interesting details I used to overlook.
Among them, I discovered the coaling shed located by the turntable seems to have survived until the end of the line. According to an old photograph of the depot (which I can't unfortunately share due to copyright), it appears the shed seen on the 1894 panoramic shot used on the blog banner was still standing. This little bit of information is crucial, because it helps to better understand how the station evolved. Particularly in a case where I have yet to find out Temiscouata Railway archives (if ever possible).
This discovery is important, because it means - in term of structures - Connors changed very little between the initial construction back in the late 1880s and the demise in the mid-1940s. During that period, the only notable change is the addition of a well-documented section/bunk house. The architectural details on that structure are also a good indication it was built in a time of relative prosperity, probably just before the First World War. Another small difference is the adjunction of a post office to the passenger depot, which incidently probably occured early in history.
Given that, I feel I have a better grasp of Connors, particularly given the scarcity of my knowledge on that subject matter. However, new information is bound to be discovered during the project as it always happens. Thus, instead of postponing the project in hope of reaching the truth, I'm seriously thinking about creating a first working scale version and improve it until I can move to something more substantial. There are a lot of areas I want to experiment better, starting with scenery in general, and vegetation in particular. Since practice makes perfect, I see little benefit constantly procrastinating.

Wednesday, October 11, 2017
Tuesday, October 3, 2017
If Connors was set in the 1940s
While the
long due renovation of my house are underway, I’m still giving some thoughts
about the Connors layout, mainly due to Jamie Bothwell who prepared some elements for the layout. To be honest, I’ve never seen this project as something that had to
be done as fast as possible, but rather as something well worth taking time to
do things right and progress.
Over the
last few weeks, I’ve been revisiting my original design set in the 1910s and
looked at what could be done for something set in the post-1930 era. A lot of
data from that era exist, making it easier to figure out how trains were
handled by Temiscouata Railway.

So, for
this reason, I decided to put together a more modern version of the terminal
before it was abandoned. The biggest changes at that time were the MoW track
that was moved in front of the station while the second turnout on the team
track siding was simply removed. These changes don’t impact that much the
operation process at Connors, but they do show the railway tried to eliminate
useless elements to streamline as much as possible the terminal. To be honest,
it is rather efficient and from a layout perspective, makes things much easier
to handle. As a layout building, I must admit I'm kind of impressed by elegant simplicity of this track plan.
At the end
of the day, I must admit I am still lingering asking myself which era suits my
needs best. Not an easy answer, but at this point, it is all about conveys the
sense of the place. To me, Temiscouata is all about small time railroading,
light weight rails, tall grass and serene countryside. Backwood location,
retreating agriculture and hard working men struggling to keep a failing yet
proud enterprise all speak to me. This is probably due to my own personal
background being raised at the fringe of a dying colonization village.
That said,
focussing the project on the ambiance rather than the train themselves (and no,
it doesn’t mean neglecting that aspect at all) helps me to set the priorities
on the project. Particularly in terms of motive power, which is always the
worst “I want it all” situation we must face. As things stand if a post-1930s scenario
is adopted, only one locomotive would be required to operate the layout, namely
an ex-Quebec Central 4-4-0. Less is more they say, and it seems to me having
one loco is a good way to cherish, maintain, detail and care about it. A personal
association is created with this little working horse. And at the end of the
day, it helps to keep the project affordable and manageable. And let's be honest, given this locomotive will be probably built almost from scratch, it will far less intimidating!
Sunday, February 5, 2017
Temiscouata #1 - A Project?
It will be no surprise for people following this blog that TMC #1 is going to be my first 1:64 locomotive. Many factors lie behind this decision, but mainly, it's the easiest one to build with my actual skills and available components.
To be honest, knowing where to start with such a crazy layout project isn't a piece of cake... A module? A piece of track? A freight car? A structure? or a locomotive? Well... I don't know but I'm looking at several possible project to officially start working on something.
At least, I was recently able to get old CDS Lettering dry transfer sets and that's a big problem behind me! In that regard, I'm now hunting old Ridgehill Models Fowler boxcars suitable for Intercolonial and Grand Trunk. I guess they had the original wood roofs and 5' doors back then.
But a far bigger problem is finding suitable motive power. Old time 4-4-0s are on my list, but it probably won't happen until much later... and certainly, a 4-6-0 would be sweet in the long run. However, I've got to start somewhere, taking into account my skills, resources and what's available.
I've been studying the sole Mogul ever owned by Temiscouata and it seems the little locomotive could be kitbashed in S scale. After looking at CNR locomotive diagrams (C-3-c and C-5-b) and a few pictures including #1 builder picture (which can be seen in Donald R. McQueen's Canadian National Steam! Volume 3, p. C-7). It must be noted I found some discrepancies between McQueen's and others histories about #1. McQueen states it was purchased in 1916 from a NTR contractor (Cavicchi & Pagano Contractors #5) and sold circa 1920 (other sources say 1918) while others indicate it was purchased new from MLW in 1910 and sold in 1911 when found unsastisfactory.
From what I've seen, and this is only my opinion, I find it weird TMC sold the original #1 in 1910, left the number not used for almost 6 years while acquiring many other locomotives and reassigning available numbers. It makes more sense to have scrapped the old #1, replaced it with a local mogul used by a contractor in the area and swapped quickly with Canadian Government Railway #4537 (ten-wheeler) when deemed unfit for its purpose. However, other sources indicate the original #1 left Temiscouata in 1916 for Davie Shipbuilding in Lévis, QC.
But that said, we know NTR opened the line between Moncton & Estcourt in 1913. It was operated on a limited scale by ICR then. Could McQueen be right? Maybe. He got the builder pictures and MLW order story to back up his claim. Given the road was still under construction up to 1913, it's unlikely the contractor sold the engine before that date. He also indicates a lot of misunderstanding did exist about this particular MLW order. One thing is sure, I'm seriously starting to believe the roster published along with Mr. Lemon's article on Old Time Trains musn't be taken at face value. Thus, the second #1, replacing the old Dübs 4-4-0 in 1916 is starting to make a lot of sense...
Well, we could speculate a lot and be completely wrong. At this point, I won't make a ruckus about that, it seems quite trivial to the grand scheme.
But leaving aside the historical inaccuracies, I have enough technical data to start to figure out how to build this particular locomotive. I’ve discussed the project with David Clubine and Simon Dunkley, which have parts that could help to build up a decent drive. We discovered the old Rex 2-6-0 frame has the correct driver wheelbase (approx.. 12’-6”) and that River Raisin Models 0-6-0 51” drivers are compatible. Add to this a NWSL gearbox and good motor and we can say we have a solid base to start.
On the other hand, almost everything else on the Rex model is inadequate and can’t be directly reused. At least, some detail parts and bits can be of use. However, it is a fact virtually everything else will have to be scratchbuilt including the boiler, cab and tender. It shouldn't be that much of a problem at this point using brass, styrene and other materials. Anyway, my HO Grand Trunk 2-8-0 kitbash thought me sometimes it’s better that start from scratch than pour countless hours modifying a part.
The next step will be to measure and draw the drive to scale in CAD then start designing the superstructure to fit it according to dimensional data from old steam locomotive diragrams. Then, I'll bash the model in SketchUp to see how everything fits together before building. I wouldn't be surprised if some parts are 3D printed and maybe some involve lasercut down the road. That aside, it will probably built the good old way.
Meanwhile, the drive will have to be assembled, drivers quartered and motorization fine-tuned. At this point, I’m glad I’m modelling an early 1910s locomotive that didn’t saw too much modifications since its original construction.
To be honest, knowing where to start with such a crazy layout project isn't a piece of cake... A module? A piece of track? A freight car? A structure? or a locomotive? Well... I don't know but I'm looking at several possible project to officially start working on something.
At least, I was recently able to get old CDS Lettering dry transfer sets and that's a big problem behind me! In that regard, I'm now hunting old Ridgehill Models Fowler boxcars suitable for Intercolonial and Grand Trunk. I guess they had the original wood roofs and 5' doors back then.
 |
| C-5-b diagram, almost virtually similar to a C-3-c (credit: trainweb.org) |
But a far bigger problem is finding suitable motive power. Old time 4-4-0s are on my list, but it probably won't happen until much later... and certainly, a 4-6-0 would be sweet in the long run. However, I've got to start somewhere, taking into account my skills, resources and what's available.
I've been studying the sole Mogul ever owned by Temiscouata and it seems the little locomotive could be kitbashed in S scale. After looking at CNR locomotive diagrams (C-3-c and C-5-b) and a few pictures including #1 builder picture (which can be seen in Donald R. McQueen's Canadian National Steam! Volume 3, p. C-7). It must be noted I found some discrepancies between McQueen's and others histories about #1. McQueen states it was purchased in 1916 from a NTR contractor (Cavicchi & Pagano Contractors #5) and sold circa 1920 (other sources say 1918) while others indicate it was purchased new from MLW in 1910 and sold in 1911 when found unsastisfactory.
From what I've seen, and this is only my opinion, I find it weird TMC sold the original #1 in 1910, left the number not used for almost 6 years while acquiring many other locomotives and reassigning available numbers. It makes more sense to have scrapped the old #1, replaced it with a local mogul used by a contractor in the area and swapped quickly with Canadian Government Railway #4537 (ten-wheeler) when deemed unfit for its purpose. However, other sources indicate the original #1 left Temiscouata in 1916 for Davie Shipbuilding in Lévis, QC.
But that said, we know NTR opened the line between Moncton & Estcourt in 1913. It was operated on a limited scale by ICR then. Could McQueen be right? Maybe. He got the builder pictures and MLW order story to back up his claim. Given the road was still under construction up to 1913, it's unlikely the contractor sold the engine before that date. He also indicates a lot of misunderstanding did exist about this particular MLW order. One thing is sure, I'm seriously starting to believe the roster published along with Mr. Lemon's article on Old Time Trains musn't be taken at face value. Thus, the second #1, replacing the old Dübs 4-4-0 in 1916 is starting to make a lot of sense...
Well, we could speculate a lot and be completely wrong. At this point, I won't make a ruckus about that, it seems quite trivial to the grand scheme.
But leaving aside the historical inaccuracies, I have enough technical data to start to figure out how to build this particular locomotive. I’ve discussed the project with David Clubine and Simon Dunkley, which have parts that could help to build up a decent drive. We discovered the old Rex 2-6-0 frame has the correct driver wheelbase (approx.. 12’-6”) and that River Raisin Models 0-6-0 51” drivers are compatible. Add to this a NWSL gearbox and good motor and we can say we have a solid base to start.
On the other hand, almost everything else on the Rex model is inadequate and can’t be directly reused. At least, some detail parts and bits can be of use. However, it is a fact virtually everything else will have to be scratchbuilt including the boiler, cab and tender. It shouldn't be that much of a problem at this point using brass, styrene and other materials. Anyway, my HO Grand Trunk 2-8-0 kitbash thought me sometimes it’s better that start from scratch than pour countless hours modifying a part.
The next step will be to measure and draw the drive to scale in CAD then start designing the superstructure to fit it according to dimensional data from old steam locomotive diragrams. Then, I'll bash the model in SketchUp to see how everything fits together before building. I wouldn't be surprised if some parts are 3D printed and maybe some involve lasercut down the road. That aside, it will probably built the good old way.
Meanwhile, the drive will have to be assembled, drivers quartered and motorization fine-tuned. At this point, I’m glad I’m modelling an early 1910s locomotive that didn’t saw too much modifications since its original construction.
Monday, January 30, 2017
Fine Tuning the Era
Determining your era when modelling in Ho scale is a matter of preference. Whatever you choose, there is a chance you'll find out what you want in the long run.
In S scale, you got to tailor your goals according to what is available or doable. In my case, finding freight cars isn't exactly a walk in the park, but nice stuff like Fowler boxcars, early steel twin hopper cars and good old wooden gondolas and truss rod boxcars and reefer can be found or scratchbuilt.
However, finding decals is another matter and as you can't do everything, I decided to see what was available. I was lucky to find a bunch of CDS Lettering dry transfers for classic Canadian roads of the day: Canadian Pacific, Canadian Northern, Grand Trunk/GTP and Intercolonial. These cars were often seen in the area back then. However, there is a catch. Most decals represent cars in service between 1906 and 1914. While I set my era in 1911, it means I should push the date forward to the eve of the Great War. It seems 1913 would be my safest bet. Does it change anything on the layout? Nothing at all but it's good to know that at that time, the National Transcontinental Railway was now serving Edmundston and interchanging with Temiscouata. Also, it wouldn't be out of place to see a motor car by the station at this date and newer railway designs such as the Fowler car can run on the layout without creating discrepancies.
For Temiscouata, the decals available are all for cars repainted in the mid 1930s. I think the reporting marks and data can be salvaged.
And as crazy as it sound, I love dry transfer. I used to hate them until I made a bunch of cars last summer for a friend's layout. When you know how to work with them, they are much pleasant than decals which always leaves some weird ghosting whatever you do. Dry tranfers also works better on real wood cars than waterslide decals.
As for locomotives, given S Scale is a rich man's world, I decided it was better to start of with one excellent model rather than waste my resources on many of them. I'm convinced a good old time 4-4-0 will do the job better than anything else. It will have to be built from scratch so I'm in no hurry. In that regard, I've examined many old Temiscouata locomotives and it is evident that in the 1910s, their boiler jacket sheeting had got a serious amount of abuse over the time. They were no longer the new kids on the block and I feel it would be neat to model boilet jacket full of scratch and dent. I've never seen that kind of weathering and think it would be very neat to represent an old lady doing her last waltz on the dance floor.
To be noted, I don't expect to work on S Scale projects in earnest before next fall. My schedule is loaded beyond control until then and I'll be happy if I can buy and build a freight car. I must admit I'm lured by the idea of building a Ridgehill Intercolonial Fowler boxcar.
Until then, I'll concentrate my efforts on Hedley-Junction and building my new 1:1 workshop. I reworked my design from last year to look more like a 1890s-1910s building. I'm seriously thinking about applying wainscotting and moldings to the second floor future train room to get a nice turn of the century railway look. The main floor will be the real workshop and I plan to have a comfortable space for modelling. I think most people would be facepalming if they knew I'm modelling and airbrushing on my computer desk which generally have no more clear space than a 1 square foot area!!!
Sunday, January 22, 2017
First Ballasting Test
Yesterday, while scenery was drying on the club layout, I made a quick ballasting test using my homemade ballast. This material is sampled and sifted from an abandoned limestone and clay pit located nearby.
To be blunt, I'm far to be satisfied by the results for many reason I'll take a few minutes to explain. This isn't what I'm looking for at all and it doesn't fit Temiscouata pictures.
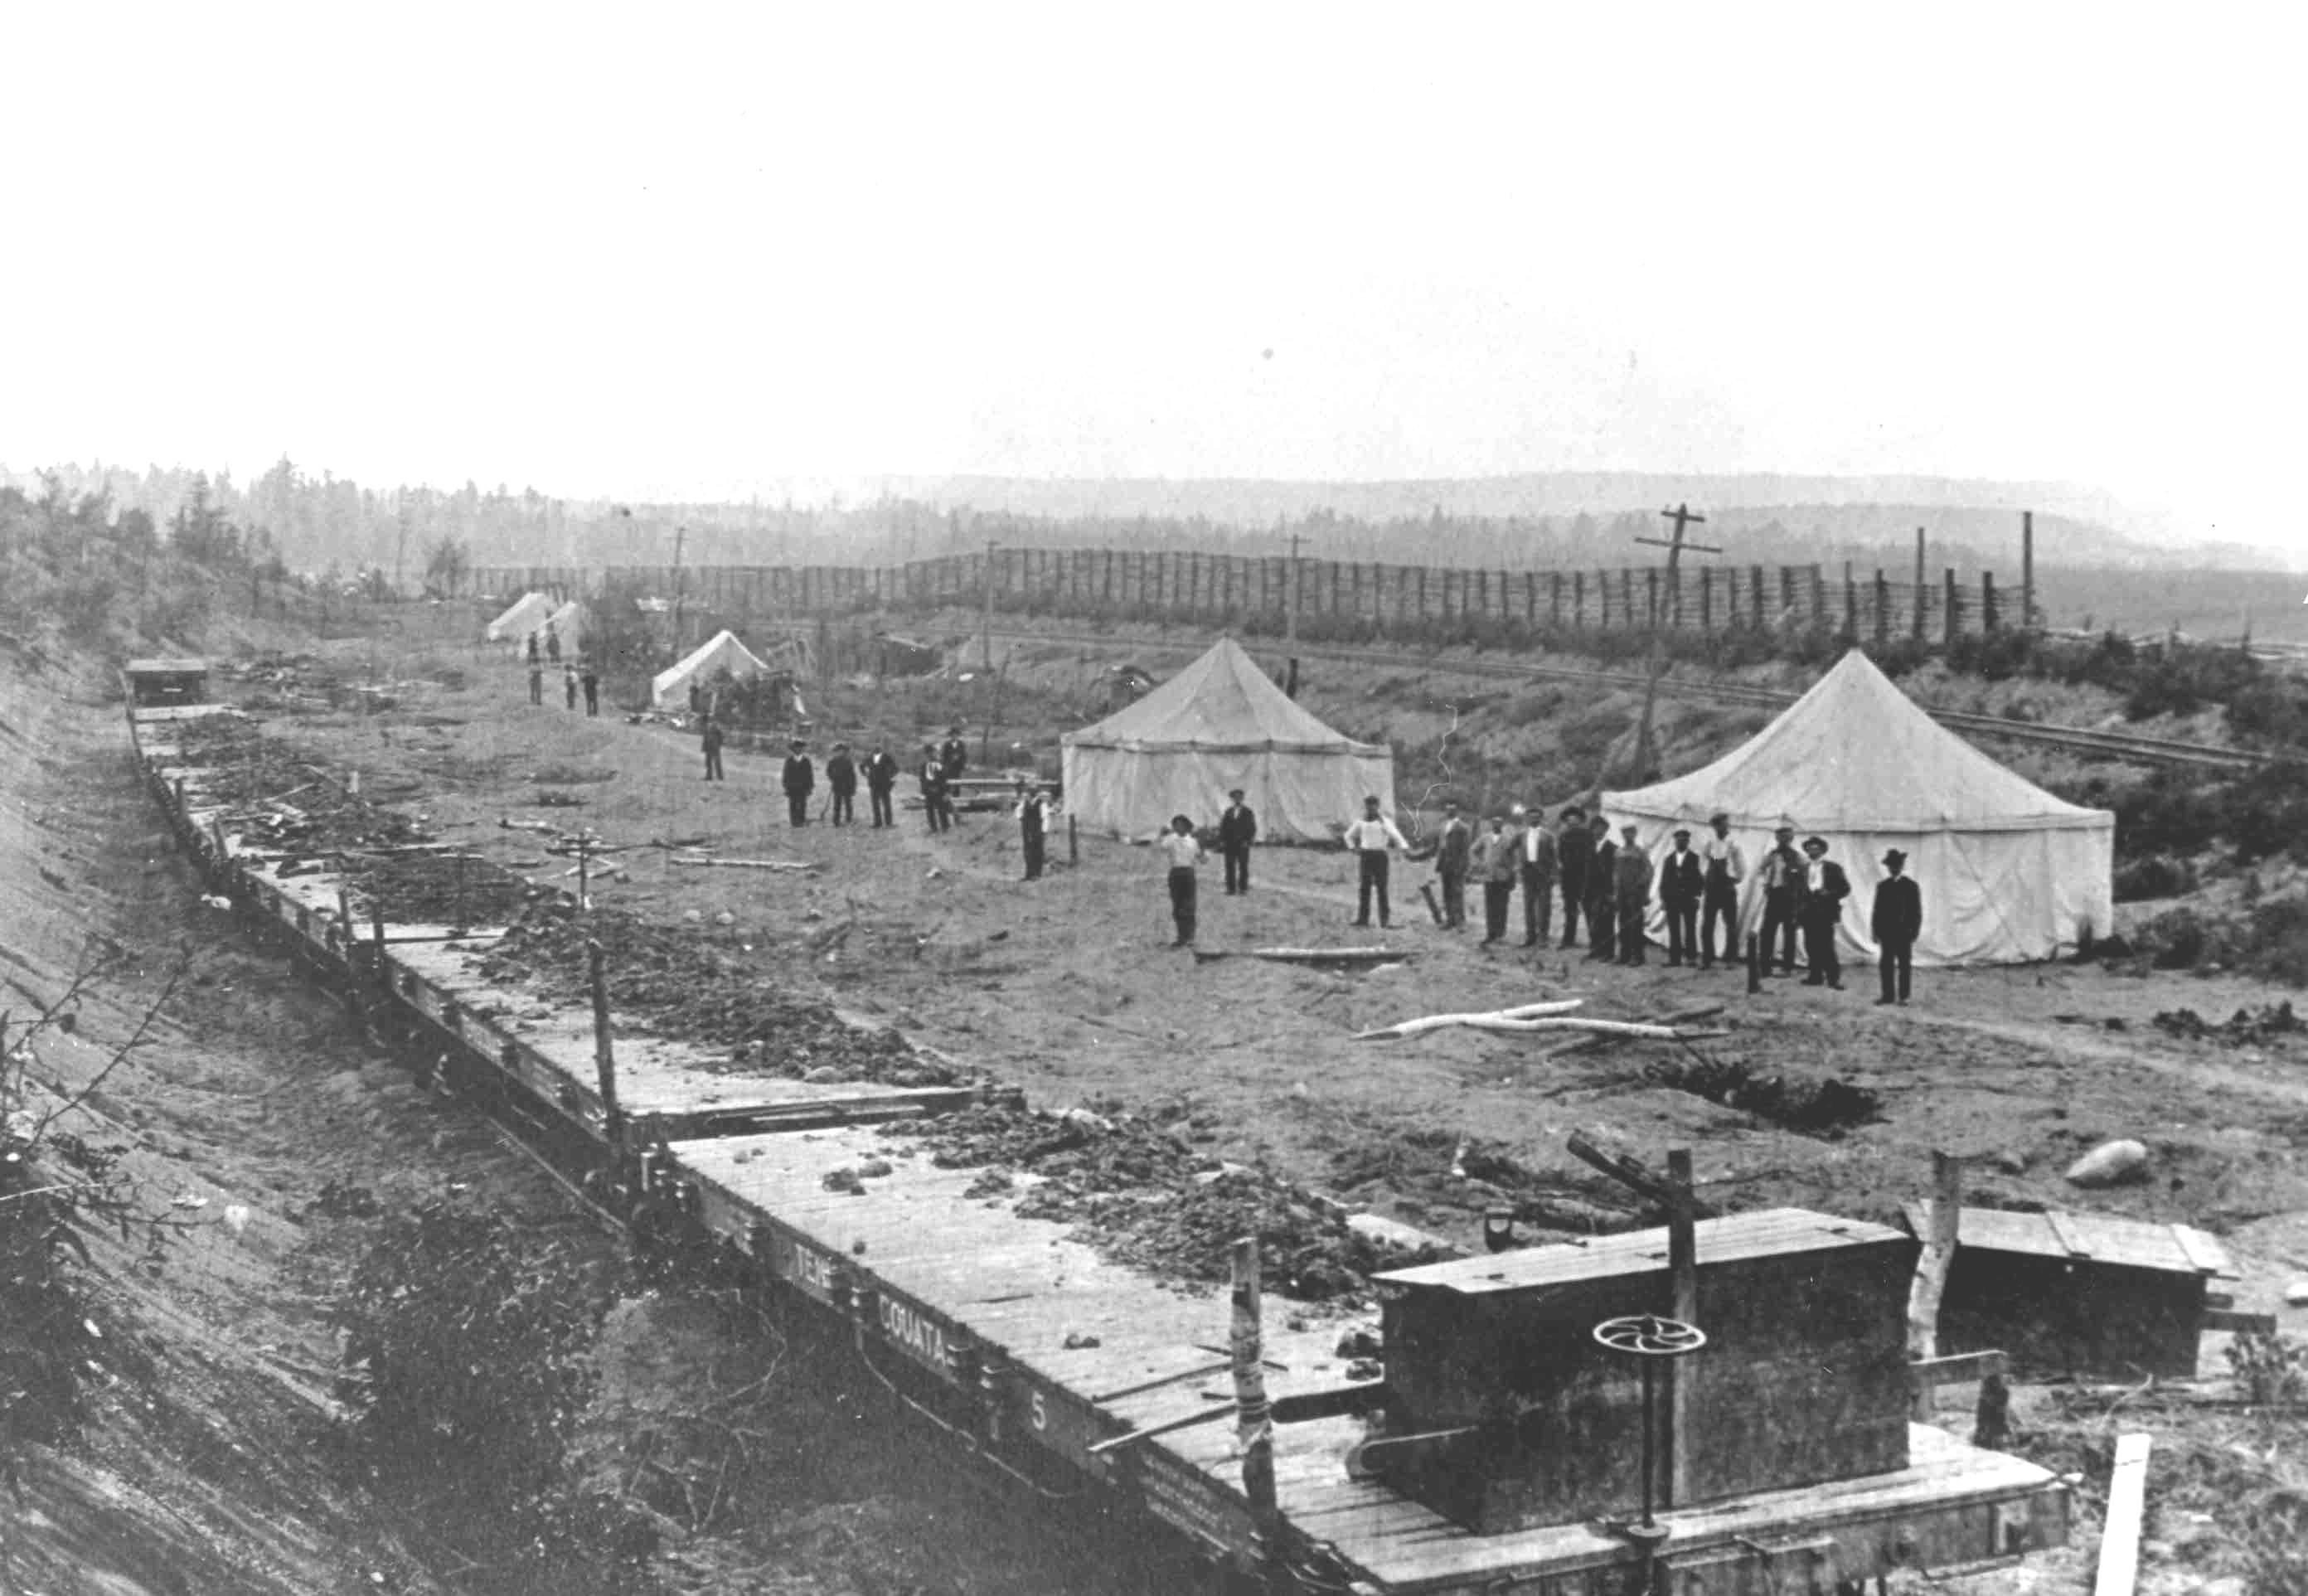
Let's talk about the prototype. On all picture, there is virtually no roadbed. The track is at ground level except when topography required a fill, an embankment or cut. The very notion of ditch seem to have been highly ignored by Temiscouata Railway. The ballast isn't ballast as I suspected. It is nothing more than earth and dirt. Very fine dirt in fact and exactly the same that can be seen on adjacent lots. When you look at this picture of a construction train back then, you can clearly understand anything goes on.
Let's take a look at the prototype ballast before analyzing my test. The first picture was shot at Rivière-du-Loup with the glamourous Madawaska business car (which I'd like to reproduce). The ballast is plainly dirt.
On this other picture, taken at Cabano, the ballast as some bigger chunk in it, more akind to a dirty gravel. But still, is not what you would call real ballast.
Now let's look what I did and why I think I failed...

First, my ballast is too coarse compared to the prototype. Given the ties are roughly 9 inches wide, it means some rocks are about 3 inches in diameter, which is clearly too big. It doesn't look like earth to me.

Another problem is the ballast "powder. that gets into the distressed wood grain, killing a good deal of the effect by making the cracks look whitish.

I tried to remedy to that problem by cleaning some ties and applying another light coat of alcohol and India ink. The improvement isn't that much great.

Finally, I put too much ballast, even if I tried to not bury the ties. The big problem is that ballast get caugh under the rails which kills the effect of "floating" rails so typical on Temiscouata.
Also, I'm not too sure about the ballast coloration. It is far too gray to my taste. I believe it should be a little bit browner, maybe slightly tan. I'm not sure. Should there be more contrast between the ties and ballast? I'm not sure either. Maybe the soil should be slightly darker to make the greyish and decaying ties pop out? Or maybe the ties should be a little bit more brown/tan. I say that because I've just looked at some old color slides from QRL&PCo - namely an old stub switch - and the ties are squared logs and seems untreated and they have a nice golden coloration... very similar to what Bernard Kempinski does. I think he was right!
At this point, I'm alsolutely open to any suggestion to improve the look. Meanwhile, I've ordered some supplies including rails, ties and spikes. As you can see, my glued rails popped at the first occasion, but it's because ofo that I was able to discover ballast gathered under the rail.
This brings another set of question. Should the ties and ballast be placed before laying rails? Or should the final distressing should be done AFTER ballasting and before laying track, making sure the ballast wouldn't fill the cracks? The answer will probably be got by laying a few other test tracks and trying each techniques. My biggest concern would be for turnout...
Also, I think I'll have to make the tie edges rounder to better represent half-sawn logs.
To be blunt, I'm far to be satisfied by the results for many reason I'll take a few minutes to explain. This isn't what I'm looking for at all and it doesn't fit Temiscouata pictures.
Let's talk about the prototype. On all picture, there is virtually no roadbed. The track is at ground level except when topography required a fill, an embankment or cut. The very notion of ditch seem to have been highly ignored by Temiscouata Railway. The ballast isn't ballast as I suspected. It is nothing more than earth and dirt. Very fine dirt in fact and exactly the same that can be seen on adjacent lots. When you look at this picture of a construction train back then, you can clearly understand anything goes on.
 |
| Temiscouata Railway construction crew (credit: UMCE) |
Let's take a look at the prototype ballast before analyzing my test. The first picture was shot at Rivière-du-Loup with the glamourous Madawaska business car (which I'd like to reproduce). The ballast is plainly dirt.
 |
| Rivière-du-Loup station (credit: Musée du Bas-Saint-Laurent) |
 |
| Cabano station (credit: Musée du Bas-Saint-Laurent) |

First, my ballast is too coarse compared to the prototype. Given the ties are roughly 9 inches wide, it means some rocks are about 3 inches in diameter, which is clearly too big. It doesn't look like earth to me.

Another problem is the ballast "powder. that gets into the distressed wood grain, killing a good deal of the effect by making the cracks look whitish.

I tried to remedy to that problem by cleaning some ties and applying another light coat of alcohol and India ink. The improvement isn't that much great.

Finally, I put too much ballast, even if I tried to not bury the ties. The big problem is that ballast get caugh under the rails which kills the effect of "floating" rails so typical on Temiscouata.
Also, I'm not too sure about the ballast coloration. It is far too gray to my taste. I believe it should be a little bit browner, maybe slightly tan. I'm not sure. Should there be more contrast between the ties and ballast? I'm not sure either. Maybe the soil should be slightly darker to make the greyish and decaying ties pop out? Or maybe the ties should be a little bit more brown/tan. I say that because I've just looked at some old color slides from QRL&PCo - namely an old stub switch - and the ties are squared logs and seems untreated and they have a nice golden coloration... very similar to what Bernard Kempinski does. I think he was right!
At this point, I'm alsolutely open to any suggestion to improve the look. Meanwhile, I've ordered some supplies including rails, ties and spikes. As you can see, my glued rails popped at the first occasion, but it's because ofo that I was able to discover ballast gathered under the rail.
This brings another set of question. Should the ties and ballast be placed before laying rails? Or should the final distressing should be done AFTER ballasting and before laying track, making sure the ballast wouldn't fill the cracks? The answer will probably be got by laying a few other test tracks and trying each techniques. My biggest concern would be for turnout...
Also, I think I'll have to make the tie edges rounder to better represent half-sawn logs.
Saturday, January 21, 2017
Early Temiscouata Track Standards (Tentative)
After looking at many pictures and trying to determine various dimensions from known components here are a few rough observations that will probably need to be refined when more information will be available. One thing is sure, the trackwork was so full of discrepancies many jigs available on the market just fail to convey that look. I'll probably have make a few of mine.
-28 feet long (to be confirmed by standard 1890s practices, TMC built the line with 32 feet flat cars)
-4-bolt joint bars
-Width: highly variable, from 8 to 10 inches
-Length: average 8 feet 6 inches(it varies wildly in fact)
-Spacing: 24" center/center
-Switch machine: wooden with large target
-Doesn't reach the top of the ties (about 3 to 4 inches of clearance under the rail)
Rails:
-60 lbs-28 feet long (to be confirmed by standard 1890s practices, TMC built the line with 32 feet flat cars)
-4-bolt joint bars
Ties:
-Height: 7 inches-Width: highly variable, from 8 to 10 inches
-Length: average 8 feet 6 inches(it varies wildly in fact)
-Spacing: 24" center/center
Turnouts:
-Type: stub switch-Switch machine: wooden with large target
 |
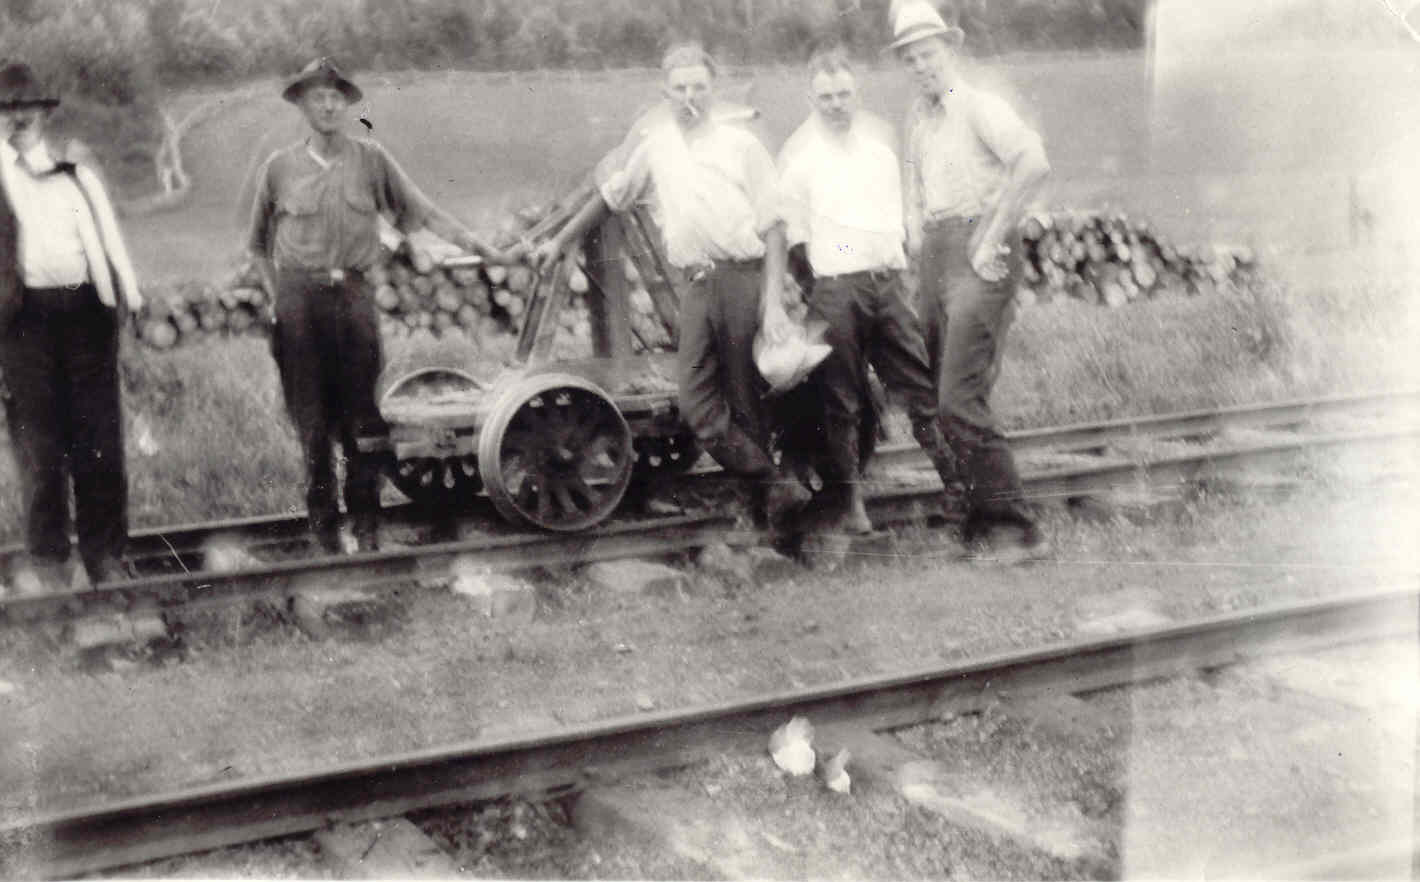
| 3-way stub switch in Ste. Anne de Beaupré. TMC had longer central post (O. Lavallée) |
Ballast:
-Mainly dirt with some bigger chunk-Doesn't reach the top of the ties (about 3 to 4 inches of clearance under the rail)
Telegraph Poles:
-Single pole, no crossarm, single insulator on wood corbelFriday, January 20, 2017
First Time Handlaying Track
Today I decided to handlaid a 18 inches long piece of track to see what I could do with available materials and decide on ties looks and colors. While I didn't have spikes nor track gauge, I decided to go forward. I what to use this piece of track as a scenery design study case on color, ballast, details and vegetation.

Having watched again TrainMasters TV's Roadshow track laying episode, I custom-built a tool to distress wood. I used an old ruined paintbrush, discarded the hairs and kept the socket.

Four dulled old X-Acto blades were glued together with 5-minute epoxy then glued onto the paintbrush. Before gluing, I made sure the socket was shaped in such a way the new blade assembly would fit tightly. This makes for a sturdy yet almost professional tool. As you will see in the following pictures, I think it yields great results without effort.

As much as people like to complain commercial track lack details, when you model early railways, you quickly find out there is far too much details including tie plates.
All the pictures in Connors should Temiscouata never really improved the track up there and things were quite spartan. What I wanted to achieve was similar to this picture shot in Connors.
Yesterday I browsed Bernard Kempinski Aquia Line layout blog to seek information and find how he did model his tracks. Unfortunately, as much as I have great admiration for his work, I thought something was missing and it's not until this morning I found out what it was. Every picture of old railways I found, particularly the ones when they build track, ties are nice dimensional treated lumber but rather squared logs with rounded corners. In the case of Bernard, he does a great job at coloring and he even goes as far has laser cutting extremely irregular ties for a incredible effect. However, I've not seen him rounding the edges. I believe this is seldom modelled and I decided to try my hand at it.
I think the best way to replicate an element is doing it the same way it was done back then. Using rough 3.5mm pieces of wood I once made on my table saw for a wooden bridge project, I started to round the edges with a large rasp. Unfortunately, the result was far too perfect and smooth compared to prototype pictures.

Then I decided to use my hobby knife to trim the edges into the right shape just like it would have been done back in the days (OK, they squared the log and I rounded a piece of lumber!). When I was satisfied with the slightly irregular shape, I use my new tool to distress the wood. The next step was to use a metal awl to split the wood according to what we usually see in real life.
My ties were then given a bath of India ink and 70% ink to give them a light greyish patina. Some other ties had already got a silvery finish by applying a custom mix of peroxyde and steel wool. That old trick age the wood in a matter of a few minutes and have the advantage to completely kill of the natural tan color of new wood. The recipe is simple, in a closed container filled with hydrogen peroxyde you place chunk of steel wool. A quick reaction with rust and disintegrate the steel, turning the liquid a deep oxyde red color. The next day, you only have to apply this liquid after filtering the mix. If you wish a darker color, just repeat the process. This way, I got wood to turn a deep black when I built my Erie Harlem station pontoon.
The rest was easy but quite tedious since I glued every single ties individually to the plywood plank. I know there are much more efficient methods, but that not to bad.

Rails were ripped from an old PECO code 70 piece of flextrack, pre-painted and glued on the ties. Detail West plastic fishplates were added at every 33 feet and I made sure the joints were staggered. A good coat of dark earth weathering powder was added to the rails.

Gluing track with beads of CA glue is the most unreliable way to lay rails and I will surely spike them later when I'll have the material on hand. However, I love the results and it's definitely something you can't get with commercial track.

The color is quite close to what real untreated wood kept in the soil would looks like. The added grain is also very realistic. When laying track on the layout, I will probably use exactly the same process except I will glue and sand the ties on the roadbed before rounding the edges and distressing the wood.
In the end, I can affirm track laying is fun as long as you see it as building a structure or a car. No hurry and attention to detail should bring good results. And certainly doing so in S scale really helps to easily add details compared to HO. I would certainly not attempt building a 19th century layout in HO scale!

Having watched again TrainMasters TV's Roadshow track laying episode, I custom-built a tool to distress wood. I used an old ruined paintbrush, discarded the hairs and kept the socket.

Four dulled old X-Acto blades were glued together with 5-minute epoxy then glued onto the paintbrush. Before gluing, I made sure the socket was shaped in such a way the new blade assembly would fit tightly. This makes for a sturdy yet almost professional tool. As you will see in the following pictures, I think it yields great results without effort.

19th Century Trackwork
As much as people like to complain commercial track lack details, when you model early railways, you quickly find out there is far too much details including tie plates.
All the pictures in Connors should Temiscouata never really improved the track up there and things were quite spartan. What I wanted to achieve was similar to this picture shot in Connors.
I think the best way to replicate an element is doing it the same way it was done back then. Using rough 3.5mm pieces of wood I once made on my table saw for a wooden bridge project, I started to round the edges with a large rasp. Unfortunately, the result was far too perfect and smooth compared to prototype pictures.

Then I decided to use my hobby knife to trim the edges into the right shape just like it would have been done back in the days (OK, they squared the log and I rounded a piece of lumber!). When I was satisfied with the slightly irregular shape, I use my new tool to distress the wood. The next step was to use a metal awl to split the wood according to what we usually see in real life.
My ties were then given a bath of India ink and 70% ink to give them a light greyish patina. Some other ties had already got a silvery finish by applying a custom mix of peroxyde and steel wool. That old trick age the wood in a matter of a few minutes and have the advantage to completely kill of the natural tan color of new wood. The recipe is simple, in a closed container filled with hydrogen peroxyde you place chunk of steel wool. A quick reaction with rust and disintegrate the steel, turning the liquid a deep oxyde red color. The next day, you only have to apply this liquid after filtering the mix. If you wish a darker color, just repeat the process. This way, I got wood to turn a deep black when I built my Erie Harlem station pontoon.
The rest was easy but quite tedious since I glued every single ties individually to the plywood plank. I know there are much more efficient methods, but that not to bad.

Rails were ripped from an old PECO code 70 piece of flextrack, pre-painted and glued on the ties. Detail West plastic fishplates were added at every 33 feet and I made sure the joints were staggered. A good coat of dark earth weathering powder was added to the rails.

Gluing track with beads of CA glue is the most unreliable way to lay rails and I will surely spike them later when I'll have the material on hand. However, I love the results and it's definitely something you can't get with commercial track.

The color is quite close to what real untreated wood kept in the soil would looks like. The added grain is also very realistic. When laying track on the layout, I will probably use exactly the same process except I will glue and sand the ties on the roadbed before rounding the edges and distressing the wood.
 |
| I think going back to HO and PECO will be hard! |
In the end, I can affirm track laying is fun as long as you see it as building a structure or a car. No hurry and attention to detail should bring good results. And certainly doing so in S scale really helps to easily add details compared to HO. I would certainly not attempt building a 19th century layout in HO scale!
Thursday, January 19, 2017
Gathering Information
The process of gathering information on that fascinating prototype sped up thanks to many fine folks. I'm actually quite surprised by their enthusiasm will certainly acknowledge their efforts in the future.
As I'm writing, many new facts surfaced and started to bring a new light on Temiscouata Railway. In that regard, the work of Carl Riff is absolutely pivotal in providing first hand account and evidences.
While I won't publish parts of their collection by respect toward the ones that put hard work for years, I can assure you the line is much more fascinating than I ever thought. The small doubts that lingered in mind yesterday have all been swept away this morning we I saw the old pictures.
As a matter of fact, an extensive collection of good quality photographs of rolling stock at various epochs exist, showing the variation in paint scheme. Among that, many cabooses, roofless boxcars for pulpwood, strangely braced and probably custom-built boxcars and flat cars with their load of squared timbers. Add to that a generous amount of passenger equipment, including the very neat president's car "Madawaska".
Also, while not in great quantity, at least three old original 4-4-0 are now documented, including locomotives #1, #3, #4 and #5. The more modern 4-4-0 and 4-6-0 are also very well documented which will be useful in recreating these proud iron horses.
I've also got the photographic confirmation stub switches survived at least until the 1930s at Connors.
A friend also gave me recently a CNR reprint of old Intercolonial and Grand Trunk Railway plans of various trackside structures and elements. It includes stations, fences, turnouts, culvert, telegraph poles, signs, mile post, etc. All that is relevant to my era and the good thing is we know Temiscouata Railway took inspiration from Grand Trunk practices even if it was quite low scale.
Investigation on motive power continued over the last days. After figuring out Bachmann's On30 locomotives critical dimensions I can affirm none of them are close enough to be bashed. In fact, they are quite far from Temiscouata locomotives specs. Their 4-6-0 were extremely small!
That means all locomotives for the layout will have to be built from scratch. While it will cost a lot, it means the results will be closer to the prototype, which is a big incentive for me. The next step will be to find technical drawings for these locomotives.
The 4-6-0 being MLW products, a search in Exporail could yield results. We already have the builder photo and the CNR diagram, which is a good start.
The newer 4-4-0 used at Connors were Portland-built and originally owned by Quebec Central. I have good access to their archives so maybe I can find something there.
The older 4-4-0 were of various origin. #1 was a 1872 ex-Intercolonial Dübs-built engine. We have a picture of it and there is a good deal of information available online about CNR #40 (Museum Train) and its original appearance in 1872. While not from the same builder, general dimensions were quite standard between companies. Don McQueen's Canadian National Steam! books have a few pictures of Dübs product. It could be doable.
Other 4-4-0 built in 1887 were from CLC. I have little info on them and would like to know where in the world CLC archives and technical drawings ended up.
Finally, the last pair of 4-4-0 was built by Manchester, which was merged into ALCO. Yes, even when doing steam, it seems I always have a soft spot for MLW and ALCO. As of now, I have no idea where Manchester archives are stored. I'm well aware the ALCO legacy is well alive and some historical associations exist. Finding technical drawings would be great and probably a builder picture did exist.
Yes, it's the beginning of the search, but at least it's promising. Over the last 10 years I've been doing research on New France colonial monastic architecture and I can tell you looking for documents made 400 or 300 hundreds year ago isn't exactly a walk in the park. Their archives often burned once or twice in their long history, leaving large gaps in the collective memories. At this point, the Temiscouata has already shared a few secrets.
Now, the big question is finding where the Temiscouata Railway archives ended up. It's a given CNR inherited the papers, but right now, I have no idea where they are located. Maybe Exporail, maybe the Canadiam Museum of Science and Technology, maybe somewhere else. One thing is sure, before driving any spike on the layout, it would be truly useful to find such documents. Connors being a terminal, it's almost certain several plans do or did exist.
As I'm writing, many new facts surfaced and started to bring a new light on Temiscouata Railway. In that regard, the work of Carl Riff is absolutely pivotal in providing first hand account and evidences.
While I won't publish parts of their collection by respect toward the ones that put hard work for years, I can assure you the line is much more fascinating than I ever thought. The small doubts that lingered in mind yesterday have all been swept away this morning we I saw the old pictures.
As a matter of fact, an extensive collection of good quality photographs of rolling stock at various epochs exist, showing the variation in paint scheme. Among that, many cabooses, roofless boxcars for pulpwood, strangely braced and probably custom-built boxcars and flat cars with their load of squared timbers. Add to that a generous amount of passenger equipment, including the very neat president's car "Madawaska".
Also, while not in great quantity, at least three old original 4-4-0 are now documented, including locomotives #1, #3, #4 and #5. The more modern 4-4-0 and 4-6-0 are also very well documented which will be useful in recreating these proud iron horses.
I've also got the photographic confirmation stub switches survived at least until the 1930s at Connors.
A friend also gave me recently a CNR reprint of old Intercolonial and Grand Trunk Railway plans of various trackside structures and elements. It includes stations, fences, turnouts, culvert, telegraph poles, signs, mile post, etc. All that is relevant to my era and the good thing is we know Temiscouata Railway took inspiration from Grand Trunk practices even if it was quite low scale.
Motive Power
Investigation on motive power continued over the last days. After figuring out Bachmann's On30 locomotives critical dimensions I can affirm none of them are close enough to be bashed. In fact, they are quite far from Temiscouata locomotives specs. Their 4-6-0 were extremely small!
That means all locomotives for the layout will have to be built from scratch. While it will cost a lot, it means the results will be closer to the prototype, which is a big incentive for me. The next step will be to find technical drawings for these locomotives.
The 4-6-0 being MLW products, a search in Exporail could yield results. We already have the builder photo and the CNR diagram, which is a good start.
The newer 4-4-0 used at Connors were Portland-built and originally owned by Quebec Central. I have good access to their archives so maybe I can find something there.
The older 4-4-0 were of various origin. #1 was a 1872 ex-Intercolonial Dübs-built engine. We have a picture of it and there is a good deal of information available online about CNR #40 (Museum Train) and its original appearance in 1872. While not from the same builder, general dimensions were quite standard between companies. Don McQueen's Canadian National Steam! books have a few pictures of Dübs product. It could be doable.
Other 4-4-0 built in 1887 were from CLC. I have little info on them and would like to know where in the world CLC archives and technical drawings ended up.
Finally, the last pair of 4-4-0 was built by Manchester, which was merged into ALCO. Yes, even when doing steam, it seems I always have a soft spot for MLW and ALCO. As of now, I have no idea where Manchester archives are stored. I'm well aware the ALCO legacy is well alive and some historical associations exist. Finding technical drawings would be great and probably a builder picture did exist.
Yes, it's the beginning of the search, but at least it's promising. Over the last 10 years I've been doing research on New France colonial monastic architecture and I can tell you looking for documents made 400 or 300 hundreds year ago isn't exactly a walk in the park. Their archives often burned once or twice in their long history, leaving large gaps in the collective memories. At this point, the Temiscouata has already shared a few secrets.
Track plans
Temiscouata and Quebec Central shared the same management board during my era. A recent visit at Groupe TRAQ in Charny shown QCR kept extensive records of their customers and stations. Every little upgrade and modification was drawn on paper or survived as blue print. I'm pretty sure Temiscouata did exactly the same thing, both routes had too much in common.Now, the big question is finding where the Temiscouata Railway archives ended up. It's a given CNR inherited the papers, but right now, I have no idea where they are located. Maybe Exporail, maybe the Canadiam Museum of Science and Technology, maybe somewhere else. One thing is sure, before driving any spike on the layout, it would be truly useful to find such documents. Connors being a terminal, it's almost certain several plans do or did exist.
Wednesday, January 18, 2017
Updated Track Plan
I finally updated the original HO scale track plan after a lenghty process of scaling and adjusting each element. I generally use xTrackCAD to draw my plan, but I couldn't locate a Fast Track S scale Library, so I draw it by hand using Tim Warris PDF templates as a guide.

Redrawing the plan allowed me to find out new details I overlooked in the past. Among them are fences and each of them tells us a peculiar story related to its function.
The first fence is the ubiquitous one separating the right of way from the fields. I think the old picture showing a cow grazing on the siding at Connors is enough to make this point clear! While we, modern people disconnected from large animals, can hardly imagine how a cow could be a match against a steam locomotive, we ought to remember 19th century locomotives, particularly 4-4-0, were extremely lightweight by today standards and could be easily derailed at the most insignificant obstacle on the track. Forget your YouTube train videos plowing through trailer trucks as if they were paper toys. Back in the days, any large farm or wild animal posed a serious threat that could results in serious injuries, casulties and material loss.
This became quite clear in my mind when I recently read the book The Old Somerset Railroad: A Lifeline For Northern Mainers written by Walther Mcdougall. The author had the pleasure to meet several former employees of the Somerset that worked in the early 20th century under the old management. Many of them recalled tales of 4-4-0 badly derailed by cows taking advantage of neglected fences. The most fearful event occured when a train met a bear crossing the large Gulf Stream steel trestle up Bingham. The train crew knew perfectly they had no chance. The locomotive would hit the bear, derail and crash in a 125 feet deep ravine. Chances for survival were inexistant. Fortunately, when the train was about to strike the dangerous animal, the afraid bear simply forgot it's instinct and jumped off the bridge, meeting its deadly demise on a rock by the stream.
Less impressive and dramatic are other fences found near the engine facilities. Near the coaling shed, a snow fence protect the turntable pit from getting filled up with snow. To complete this defensive wall, a cedar hedge was planted between the coaling shed and the engine house. This is the first time I see a railroad using deliberately vegetation as a mean for snow fighting. It was a common knowledge back in the days in rural areas, which is implemented again by farmers since the 2000s. I think it would make a very neat detail on a layout, one seldom seen, even on diorama.
The last fence is a large and opaque one located south of the storage/MoW siding near the engine house. It separate the railway property from the public road. At first, I was surprised they cared to build such an elaborate fence in open country, but it makes sense since the most dangerous activities were perform in that area and it needed to be secure. Also, just on the other side of the road are employees houses which could explain with they bothered putting up a fence there.
These fences are neat little details that can be easily modelled, particularly in 1:64, and that gives a deeper sense of the place. Incorporating them on the layout add interest but also helps to visually frame the scene by creating hints at the railway property limits.
Tuesday, January 17, 2017
TMC #8 - Cyber Kitbash
As I said, finding decent locomotives is a challenge. Jamie Bothwell suggested me to take a look at Bachmann's On30 4-6-0, saying some driver conversion kits do exists. It certainly would be an interesting way to get a unique small steamer at a decent price.
According to specs I could find, the Bachmann locomotive would have, in S scale, 60" drivers while the prototype had 51". Pilot wheels are also a little bit on the large size. Otherwise, the rest of the locomotive seems to be a fairly good starting point. Most parts could be kept, dome would have to be replaced, the smoke box shorten and cab highly bashed if not scratchbuilt. The tender wouldn't be a particular challenge to convert and its trucks would be swapped.
I will have to gather more information about the On30 locomotive to see if the overall size is compatible with TMC #8. I've located the CNR locomotive data sheet and will be able to make some comparison. If it is within a decent margin of error, I guess it could be a possible way to get some motive power for the line.
Meanwhile, I decided to slap together a quick little cyber kitbash to see what could be done. So far, so good. For the paint scheme, I'm not sure #8 had white tire in service. It was a common photograph gimmick used to get better contrasting builder photos. On the other hand, it does look extremely nice and would fit the era.

A New Operation Mindset & Old Papers
When I
decided to model Connors, I knew having mainline run was a pipe dream. However,
does it mean your layout isn’t interesting if you can’t run trains? Well, the
answer depends your interest, but it certainly has some merit.
As Lance
Mindheim, Rick de Candido, British modellers in general and many others proved
us, a lot can happen with very little space. However, as ridiculously small and
lacking substantial industries, Connors had much more in reserve than you run
of the mill old time diorama.
As a matter
of fact, the interest in Connors is that you have to prepare a departing train
or break off an arriving train, including local switching at the freight house
and team track. This is the reason why I decided last year to include the
entire engine facilities no because they are cute (which is true) but also
because they play a role in the story.
Now,
imagine an arriving train set on the main line. You must move forward up to the
station for a while until all passengers left the cars and
baggages/parcels/etc. have been unloaded. Now, you back the train and place the
coach and combine on the passing track so you can start break up the train and spot
the freight cars where they should go.
After that,
it’s time to visit the engine facilities, dump the ashes, take water, turn the
locomotive and store it in the engine shed where some maintenance will be
performed before tomorrow’s next assignment.
On the
returning trip, similar tasks will be required to be performed including
fueling the locomotive and turning some specific passenger cars that must be. Not
until the train is backed off at the station for boarding passenger can you
call it a day.
What’s behind an era
While
looking for information about Temiscouata Railway, I found many official government
hearings from the 19th century and newspaper clips from the early
1900s and 1910s. Many interesting bits of knowledge can be acquired there. In
that regard, I found out that what CN used to call Connors Subdivision was
known back then as the St. Francis Branch. Will I have to change the blog’s
title? Maybe.
Also,
according to old news articles, Temiscouata’s financial situation greatly
improved in the early 1900s after they experienced serious problems in the late
19th century. This is probably why they massively invested in a new
fleet of MLW-built locomotives between 1909 and 1911, before National
Transcontinental Railway stole the traffic. Temiscouata could have been a major
link between Central Canada and the Atlantic at some point and was initially
bolstered by Grand Trunk which saw it as an excellent news.
All that historic mumbo jumbo stuff means that Connors wasn't a dead place and a decaying backwood location, but a rather a healthy settlement bolstered by agricultural and lumber trade. The 1894 picture clearly show the team track was almost at full capacity and plenty of other cars were stored on the siding located near the engine house. For the modeller, it means a robust traffic that supports interesting operation.
All that historic mumbo jumbo stuff means that Connors wasn't a dead place and a decaying backwood location, but a rather a healthy settlement bolstered by agricultural and lumber trade. The 1894 picture clearly show the team track was almost at full capacity and plenty of other cars were stored on the siding located near the engine house. For the modeller, it means a robust traffic that supports interesting operation.
I also
found that government papers often write “Témiscouata” in the French orthography
rather than Temiscouata even in English papers. I’m pretty sure the company
didn’t use that French orthograph on a regular basis, however it should be
noted the company was incorporated in Québec and thus the law, back then,
required railways under provincial jurisdiction to have an official name in
French. While most companies complied, rarely they used they French names
except for a few ones including Chemin de fer de colonisation Montfort and
Chemin de fer Québec Montréal Ottawa & Occidental which was own and built
by the provincial government and later sold off to Canadian Pacific (now
Québec-Gatineau). Readers fluent in both language will find out “Occidental” –
the French adjective for West – was an awkward translation of the common
moniker “Western”. While “correct”, it sounds quite weird as nobody would use “Occidental”
to means that. However, I must admit I would be at lost to find a better replacement
word for that one! I guess the 19th century gents hit the same wall
I did! But I’ll give it to them they largely compensated by choosing one of the
most attractive paint scheme to ever grace a locomotive in the Laurentian
Valley!
Subscribe to:
Posts (Atom)